
In the left-hand menu, click on Users.
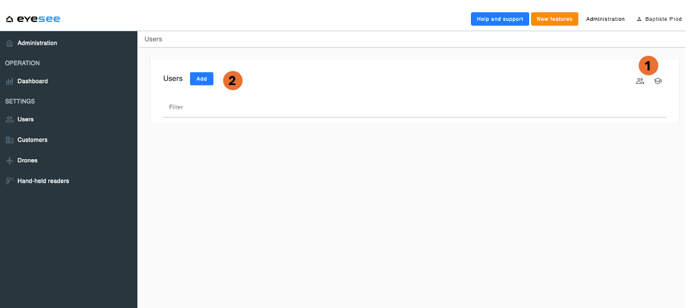
1. List existing users according to their role or certification (Cloud and Drone).
2. Click the add button to create a new user.
By clicking on the icon to list users by certification, a new screen will appear grouping users according to whether or not they are certified, in different tables. There are 4 possible types of certificates:
-
EYESEE Cloud User
-
EYESEE Drone User
-
EYESEE Cloud Trainer
-
EYESEE Drone Trainer
By clicking on a user, a table listing their certificates will appear, with the possibility to download their certificate in PDF format at any time.
If there are older certificates, they will also be displayed.
For example:


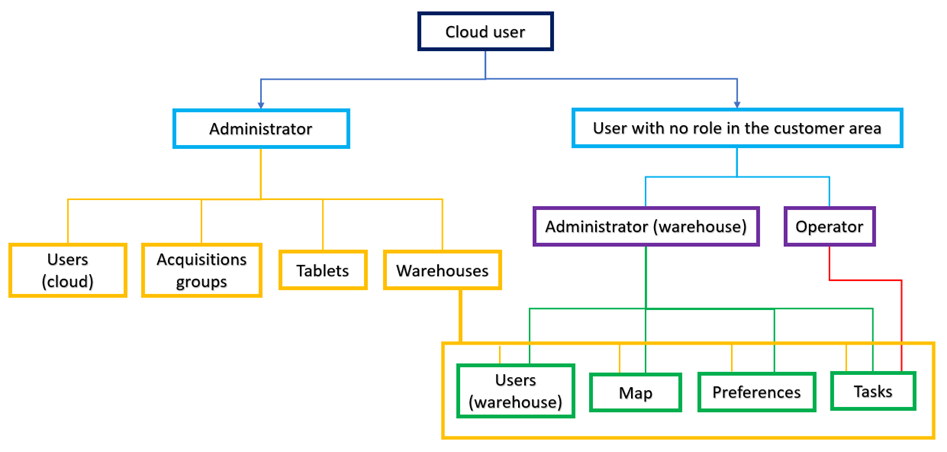
The different existing roles:
-
In the client space:

2. In the warehouse space:

Only the trainor, who has completed a specific training, can create users with the roles of Manager (client or warehouse) and Operator.
To add a user, after clicking on the add icon from the user list:
- For clients with a standard Cloud login (email + password):

1. Fill in the new user’s information: first name, last name, email, time zone (enter the city), language.
- For clients using identity delegation (LDAP):

2. Choose the desired role according to the possibilities accessible with your role.
3. When selecting ‘User in one or more warehouses’, check one or more warehouses that will be accessible to them.
4. For this warehouse or warehouses, choose the desired role according to the possibilities accessible with your role.
5. Confirm.
More detail:


1. Modify or delete a user: depending on your role, click on the corresponding icon and confirm.
Note: It is possible to delete a user from the ‘Users’ menu in the client space. From the ‘Users’ menu in the warehouse space, you can remove the user from the warehouse, but they will not be deleted from the client space nor removed from other warehouses they may be associated with.
2. Download the training certificate (for certified users).