On EYESEE Cloud:
Now, the state mission is « Task performed ». To consult it, click on its name.
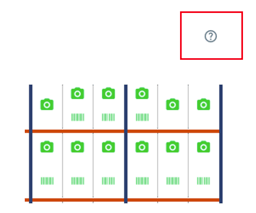
Acquisition icons details:
Mouse over on ‘i’ icon display the meaning of each icon.
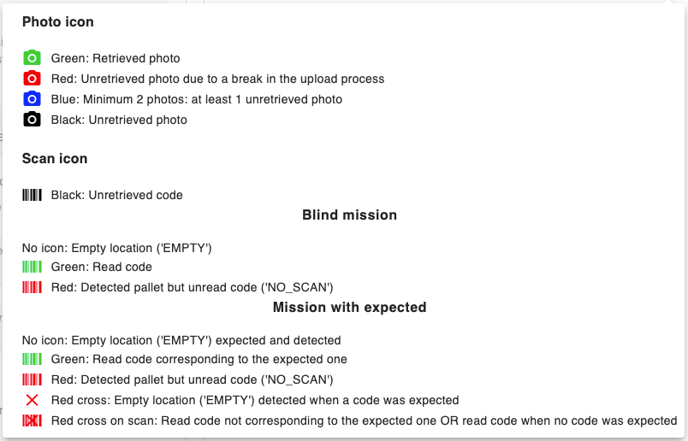
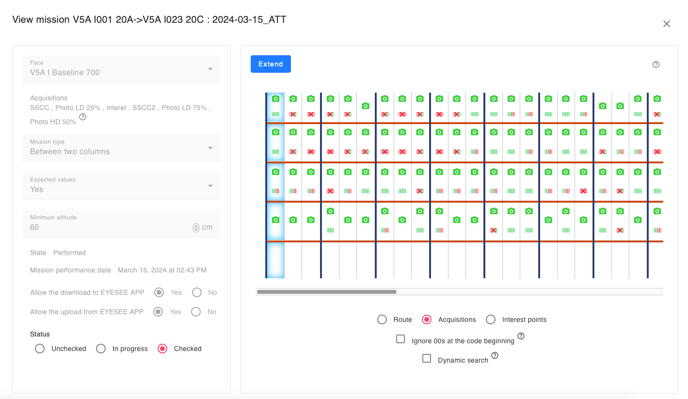
Overview of a blind mission details:
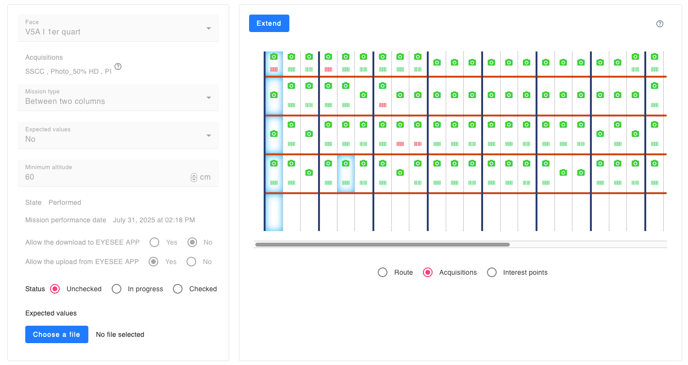

The visual of the mission being executed appears above a table showing the list of performanced missions as well as the scans and interest's point.
By clicking on a location, you can visualize the acquisitions retrieved by the drone:
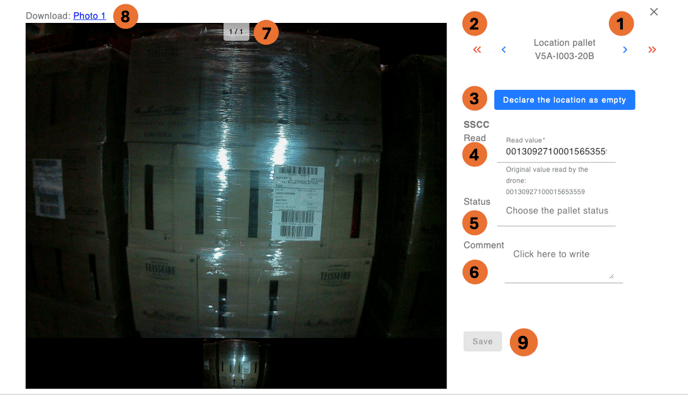
1. Scroll from one location to another
2. Scroll through the locations from one error to another
3. Button to declare the location empty: the values of the codes read are replaced by “EMPTY”
4. Scanner acquisition name and code read (can be modified)
5. Pallet status to be added if necessary. The status is included in the results file when it is downloaded.
6. Add a comment if necessary. The comment is included in the results file when downloaded.
7. Number of photo acquisitions
8. Download photos by clicking on their names
9. Save if modifications are made to the codes read
To compare the results of a blind mission directly on EYESEE Cloud, it is possible to import an expected CSV file by clicking on the “Choose a file” button:

Once the file is imported, the list of locations with expected covered displays below, and the icons colors update according to the matches:


By clicking on a location where there is an expected, the expected code displays.
Overview of the details of a mission with expectations:
By clicking on a location, you can visualize the acquisitions retrieved by the drone:

1. Scroll from one location to another
2. Scroll through the locations from one error to another
3. Button to declare the location empty: the values of the codes read are replaced by “EMPTY”
4. Modify the expected code and click on the button to replace the code read with the expected code and save.

5. Scanner acquisition name and code read (can be modified).
6. Code read.
7. Status of the pallet to be added if necessary. The status is displayed in the downloadable results file.
8. Add a comment if necessary. The comment is included in the downloadable results file.
9. Number of photo acquisitions. If there are several acquisitions, arrows are displayed to scroll through the photos taken by the drone.
10. Download the photos by clicking on their names.
11. Save if changes are made
Only for a mission with expected:
2 options are available:
- Dynamic search
- Ignore 00 of barcodes
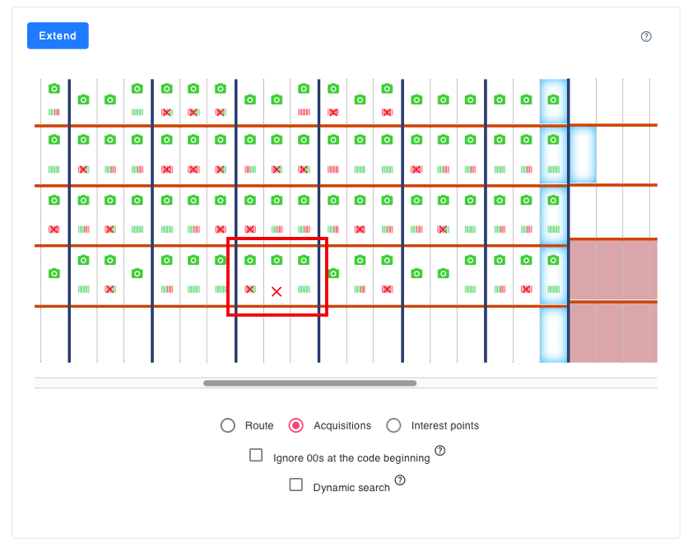
1. Dynamic search
Within the same cell, in case of dynamic locations, it is possible to check an option allowing the analysis of the scans of the locations of the same cell to look for the correspondence with the expected codes of this cell.
Here 2 errors of codes not corresponding, without the option of dynamic research:
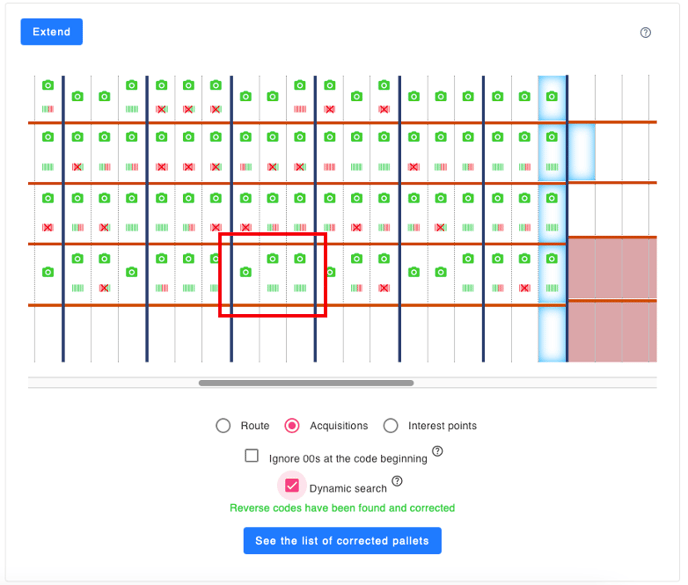
With the checked option, the scan icons correspond:
Example for a slot with 3 locations:
If there was an error with the scanned code not matching the expected for location A and location B, by checking this option, an analysis is made for locations A, B, C of this same slot. The scanned code at location A actually matches the expected for location B, so the scanned code will be moved to location A to match the expected for A.
And the code scanned at location B will be moved to location A to match the expected at A.
Thus there will be no inventory errors.
The dynamic search is taken into account in the Scans table and when downloading the CSV file of acquisitions:
2. Ignore 00 from barcodes
It is possible to ignore barcodes starting with 00 by checking the corresponding option. In this case, an expected or scanned value 0023532 is considered equivalent to 23532.
Statut
Once an assignment has been executed and reported, its default status is “Unchecked”.
There are 3 mission statuses:
- Verified
- Unverified
- In progress

By clicking on an assignment, once the error checks have been completed, you can change its status to “Checked”.
